CLICK HERE FOR THOUSANDS OF FREE BLOGGER TEMPLATES »
Showing posts with label flowers. Show all posts

Saturday, July 25, 2009

A Creating Day

Hi there!

I hope you have all been doing well!

I spent a few day in the woods at our cabin getting some "quiet time" and now I'm back and doing some paper crafting today.

I felt like getting down and dirty with the glitter. That stuff is always flying everywhere but I just LOVE it! My dogs even had some glitz on their back when I finished these flowers today.

These are my flowers that I named SPARKLERS for obvious reasons. I used two shades of blue on this first set and then a really pretty lavendar in the next picture. Just love them!


I also made a flower card this afternoon.

Each layer I decided to do something different on for a nice layered effect. The bottom layer was stamped with black ink and then I added clear iridescent glitter here and there on the petals. I hand cut around each petal too. The next petal layer I used my sizzix die for the patterned paper shape and then glued that on black and cut around it. The center was printed (as well as the stem) from printable stamps I bought on The Cutting Cafe'. I used my metallic gel pens and made a few accents and then glittered the center flower with a complimentary turquoise glitter. I glued each layer with 3D glue dots. I decided to also get out the sewing machine and do a nice thread border. It was fun to sew on paper!


I thought the ribbons at the bottom added a nice finishing touch to this card.


MyFreeCopyright.com Registered & Protected

I think I'll start dinner and relax for the night. I wish you all a nice enjoyable weekend and I'll see you next week!

Friday, June 19, 2009

A New Card for Today

Hi again everyone....

I sat down this afternoon and created this card. I wanted something soft but still with a feminine flair. I really like the blue!


I stamped the front sentiment with black archival ink and used my turquoise embroidery floss through the holes of my mini green buttons for the dots of the "i's". I used 3D glue dots to make the sentiment pop off the card front. I layered 3 papers and then added a nice turquoise grosgrain ribbon.


For the floral accent I used a pretty iridescent sequin flower layered under a bright green (looks a bit drab in this shot) felt flower, a silver metal embellishment and another green button with turquoise embroidery floss.


The inside sentiment is nice and simple for a birthday wish. It's also stamped in black archival ink as well as the little "handmade" image on the back of the card.


'MyFreeCopyright.com

TFL all and enjoy your evening!

Darlene

Monday, March 16, 2009

Scrapbook Room Re-Do Part 4

Tom finished installing all the molding/trim and I have filled the nail holes, sanded and painted them. It really sets off the colors I chose for the room. I painted the trim a "satin" finish which is the same color as the flat ceiling paint. It brings the whole room together. It's hard to see the exact color but the beige is a nice warm tone.


We added the register cover and vacuumed all the dust. We're very happy with how it looks so far. We now need to install the doors and then we will design the wall unit. This should be fun to decide exactly what we want and make it to our plans.


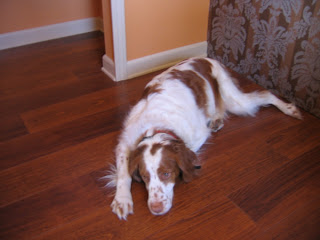
Sadie just relaxed once the vacuuming was done! She's a BIG help....NOT!


I also took a little time to create these fun 3D Origami flowers. I did some sanding and stamping on these so they could be used on more masculine scrapbook pages or cards. I really like making these!


See you in the near future.

Monday, December 15, 2008

A Blistery Bitter Cold Day

Woah, I didn't expect it to be this bone chillin' today. We are in the single digits due to the wind chill and we had rain yesterday. Who'd a thunk!!!


I had a very small quiet time today, and let me say VERY SMALL. This 60 lb. puppy doesn't like so see me craft at all. Nope, no painting, scrappin' or even organizing my goodies. She loves to play so sometimes I have to wait until she naps to get any creating done. Gee you would think she was a child and not a dog!


I did get to play a bit with my new mirror cardstock from Club Scrap. I really like how heavy this paper is and I love how reflective too.


A few embossed holiday sentiments....these will be fun to do a few LO's with.

I had a few sheets of Basic Grey's Figgy line left from last year so I made these flowers.


Of course I was in a snowy mood because of this crazy weather so I also made a set of snowflakes.


Stay warm everyone if you are in a chilly climate!

Friday, August 22, 2008

Finally ...I did a layout!

I went to a stamping convention with my daughter last weekend and we enjoyed alot of vendor demos. At one booth there was a great Make and Take for $1. My daughter Heather made a beautiful card with this Black Magic paper. It's by Core'dinations and it's great! It comes in packages of 20 colors with either pastel or jewel tones. Of course I had to purchase this. You take sandpaper and rough up the "black" side of this 80 lb. canvas textured paper and the colored core shows through. I used just the basic tan for my layout below but I can see tons of uses for all these colors in the near future!

I was able to do this layout of our new German Shorthaired Pointer (GSP) puppy yesterday between playing and naps. Her "biting" stage is slowly stopping a day at a time so it is taking a large amount of time to train her. I decided that the training was a priority instead of the scrapping if I wanted a nice doggie. My supplies ARE calling my name but I think doggie manners are more important right now. Every day I am finding a bit more time to do some "crafty" things though.

On this layout of "Gretchen" I stamped the butterfly embellies onto white vellum with a white StazOn ink pad, cut them out and added some bling on the largest one. I also used lots of Basic Grey white rub-ons. For the swirl design by the flowers I used my clear stamp swirls v:1 by the awesome Rhonna Farrer. Of course there isn't a good white stamp pad ink to make a bright and clear image over such a dark paper so I did a light image and then hand painted the swirls with my white paint and a liner brush. It was fun to do!


The flowers are made by stamping my design on plain Grungeboard (by Tim Holtz) with a black StazOn inkpad, coloring them with some metallic pearl wax and cutting them out by hand. I curled the edges a tiny bit for dimension and the curl stayed! How cool :-) I really like how they came out so I will be adding them to my Etsy shop in the near future.


I added a few white accents with the Ranger white Inkessentials pen. Love this pen!!!!
Well I'm off for more GSP care.... LOL and hopefully I will be scrappin' more in the near future.