CLICK HERE FOR THOUSANDS OF FREE BLOGGER TEMPLATES »
Showing posts with label wood floor. Show all posts

Monday, March 16, 2009

Scrapbook Room Re-Do Part 4

Tom finished installing all the molding/trim and I have filled the nail holes, sanded and painted them. It really sets off the colors I chose for the room. I painted the trim a "satin" finish which is the same color as the flat ceiling paint. It brings the whole room together. It's hard to see the exact color but the beige is a nice warm tone.


We added the register cover and vacuumed all the dust. We're very happy with how it looks so far. We now need to install the doors and then we will design the wall unit. This should be fun to decide exactly what we want and make it to our plans.


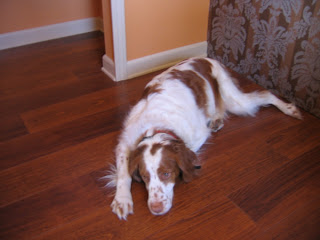
Sadie just relaxed once the vacuuming was done! She's a BIG help....NOT!


I also took a little time to create these fun 3D Origami flowers. I did some sanding and stamping on these so they could be used on more masculine scrapbook pages or cards. I really like making these!


See you in the near future.

Wednesday, March 4, 2009

The Wood Floor - Part 3

We have been working very hard on installing our Brazilian Cherry wood floor in the scrapbook room. It's been very easy to do as long as you don't have two dogs coming to visit every 5 minutes and helping. Seems like we have alot of canine supervisors lately. I was able to capture a couple of pictures of one of the biggest interruptions during this project!!!! By the way...I really am helping :-)

To back up a bit....
We had a beautiful oak hardwood floor in this room but it was just awfully worn out. This home was built in 1967 and even though it has been updated throughout most of the living area this floor hasn't been touched since then. Tom and I enjoyed alot of discussion and decided that it would be faster, less expensive and also less messy if we layed down a new floor rather than renting 2 sanders (1 large and 1 edger), restaining and finishing the existing floor. Now that the project is done I think we made the right decision!

We purchased 7 boxes of flooring going by the graph on the floor package and to our wonderful surprise we are able to return 2 boxes. This manufacturer was very generous with their square footage estimates. We will get approximately $85 back so we can go buy the door and floor moldings and not spend any extra money.

The process of each row went quite quickly.

The floor is now done and we just LOVE it. Tom is putting in the transition strip to go from our hall carpet to the new wood floor and then we can begin installing the molding.

Everything is coming together just as I visualized it to be. How exciting!

I'll post more updates on the molding and installation of new closet and entrance doors. We will then move onto designing the wall shelving unit. That will take a bit to finish I'm sure.

Monday, February 23, 2009

Scrapbook Room Re-Do

Part 2

I have been working pretty hard on this scrapbook room. I had an old wallpaper border that of course decided to NOT be strippable like advertised. So I spent a few hours with my Paper Tiger tool, wallpaper stripper and some elbow grease. I finished removing all the old paper and then washed the entire room with a cleaner and degreaser. Finally I had clean walls!


I decided to paint the ceiling a nice tan color. I have always had white ceilings in my home so I took a deep breath and painted it a color. Wow to I love it! What a new look for such a warm cozy room. It brought out the dark metal in my ceiling fixture (that is what I was hoping for) and it will coordinate well with the new dark wood floor. This has been such an exciting project for me. I can see each little piece of my vision coming to fruition a step at a time.


I had fun doing the wallpaper too! Every time I do a remodeling project in this house I talk out loud to myself about the builder (and not in a good way!). I can't believe that from the ceiling to the floor on a corner of the room was off by 1". Of course I would not have ever noticed that if I hadn't decided to wallpaper and needed a plumb line for the first piece. Wow what a surprise. With the wallpaper choice being a subtle stripe behind the damask print I would have really been in trouble if I had cheated on the first piece and didn't use a plumb line. The room would have looked like it was in a fun house instead. Now it's nice and straight. It looks wonderful and I am very happy with the results so far.
The final piece.............yippee!

I love the texture on this damask print.

Another close up pic.

The flooring is the next step. We had success with finding our flooring today and opted for a nice Brazillian Cherry. I can't wait to get started putting it in with my hubby.
More updates on the floor soon :-)
Darlene